Do you need Facebook Advertiser access to your client’s account but find yourself overwhelmed when it comes time to do it? Granting the access can feel intimidating if you don’t know your way around. While it might feel like wandering around a Minecraft world, don’t panic! We’ll give you the map to requesting access to your client’s account.

How to Request Advertiser Access on Facebook
You might be desperately combing through the Facebook help files in search of a step by step guide to requesting access, but there’s no need with this easy to follow guide.
Step 1 - How to Request Advertiser Access on Facebook
First, navigate to the Business Settings.
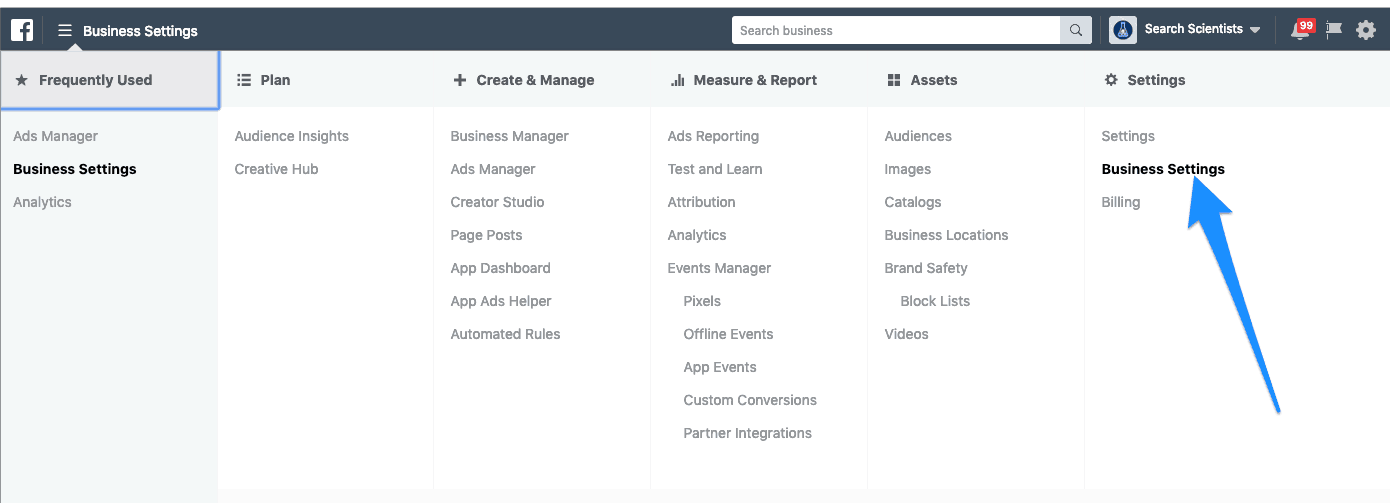
Find Accounts and then choose Pages. Now, select Request access to Facebook Ad Account ID. You will need to enter the ad account ID to request access.
If the client is unsure of what their Account ID is, they can find it by signing into Facebook Ads Manager and selecting Settings from the dropdown menu. Next, they’ll click Share the Facebook Ad Account ID.

After you make your request, the client should receive a notification. If that doesn’t happen, they should recheck the Ad Account ID for any pending requests in the Ad Account Roles section.
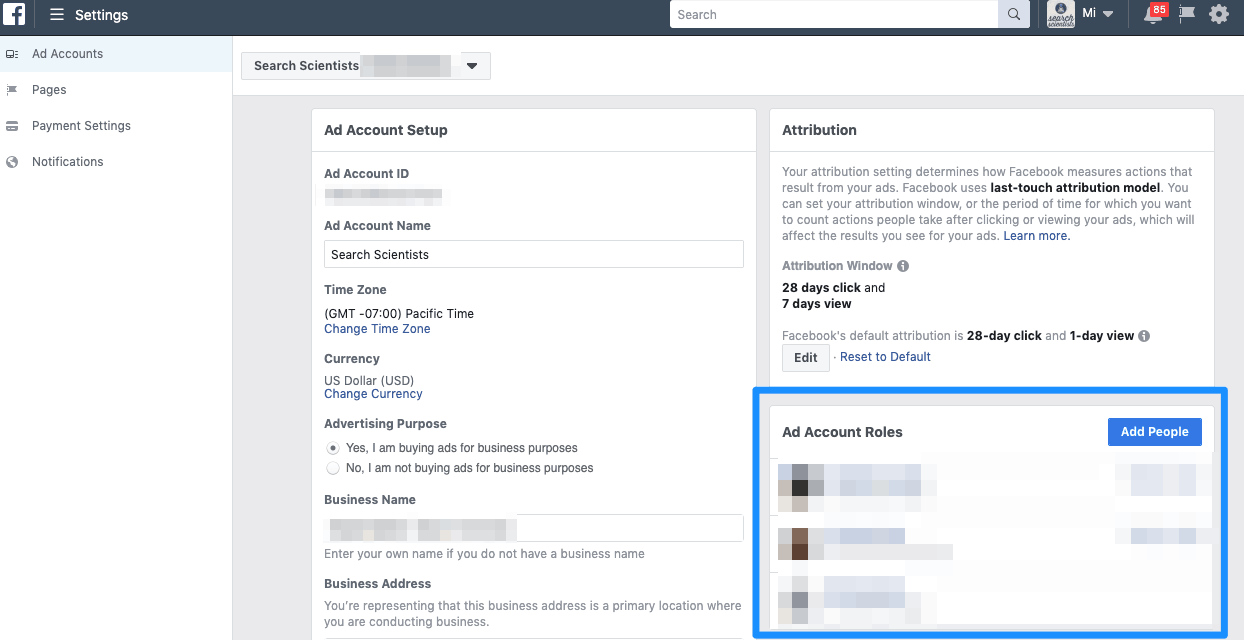
After the client has granted you access, you still have a few steps left. First, you will visit Business Settings again. Look for Accounts. Click the Add People button and add yourself as the admin.

Need Access to the Facebook Page Too?
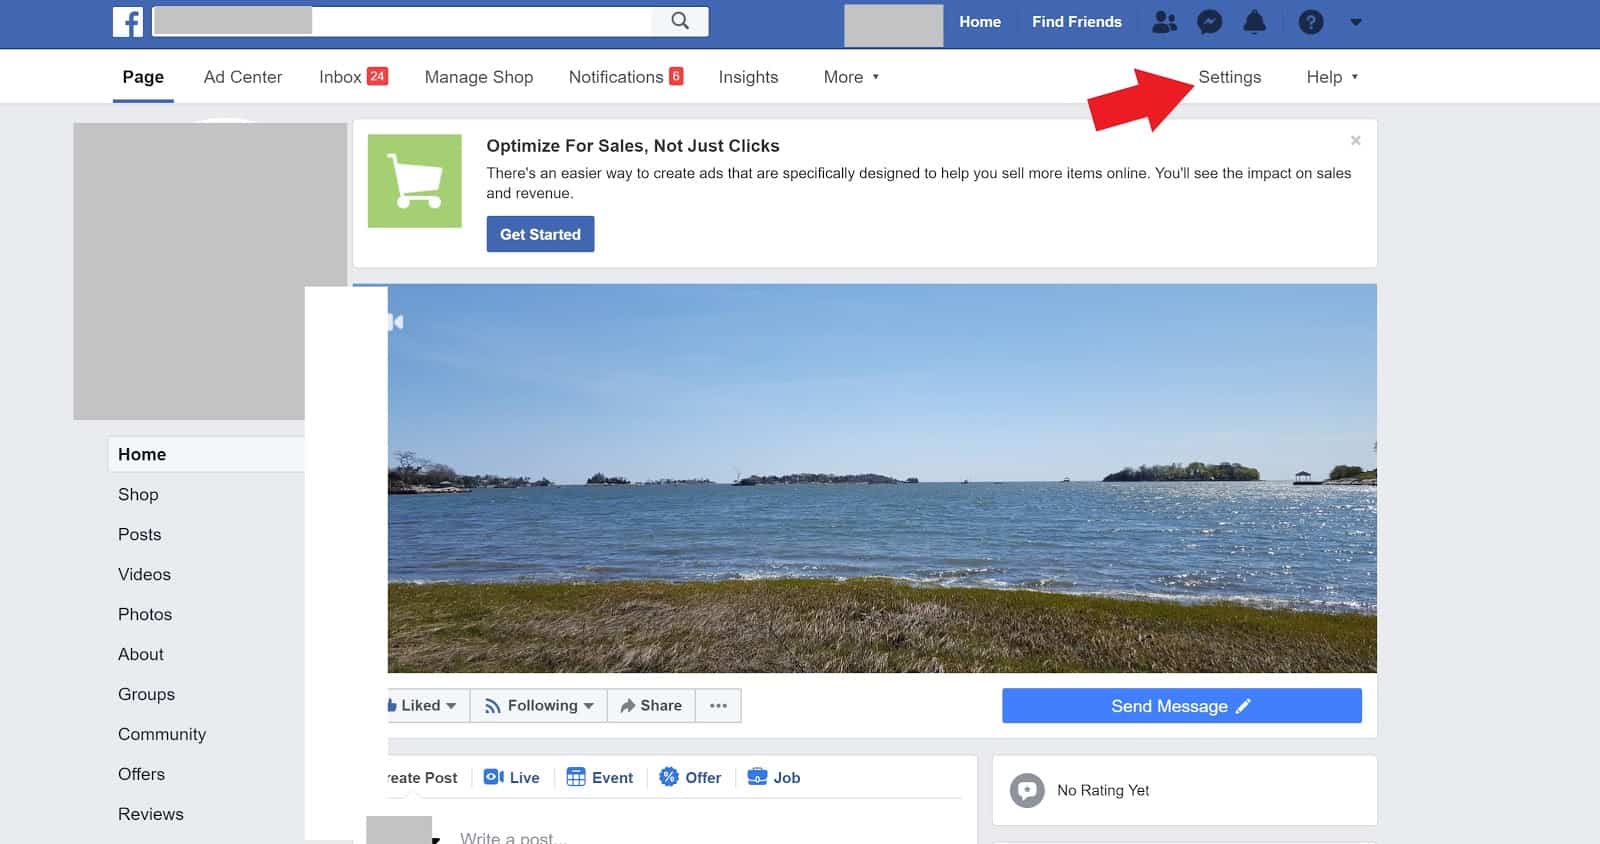
Being granted advertiser access doesn’t give you access to make edits to the Facebook Business Page itself. It’s like one of those infomercials “but WAIT, there’s more!” To have the ability to this requires a different kind of access. To start the process, your client will click Settings at the top right while logged into their business page.
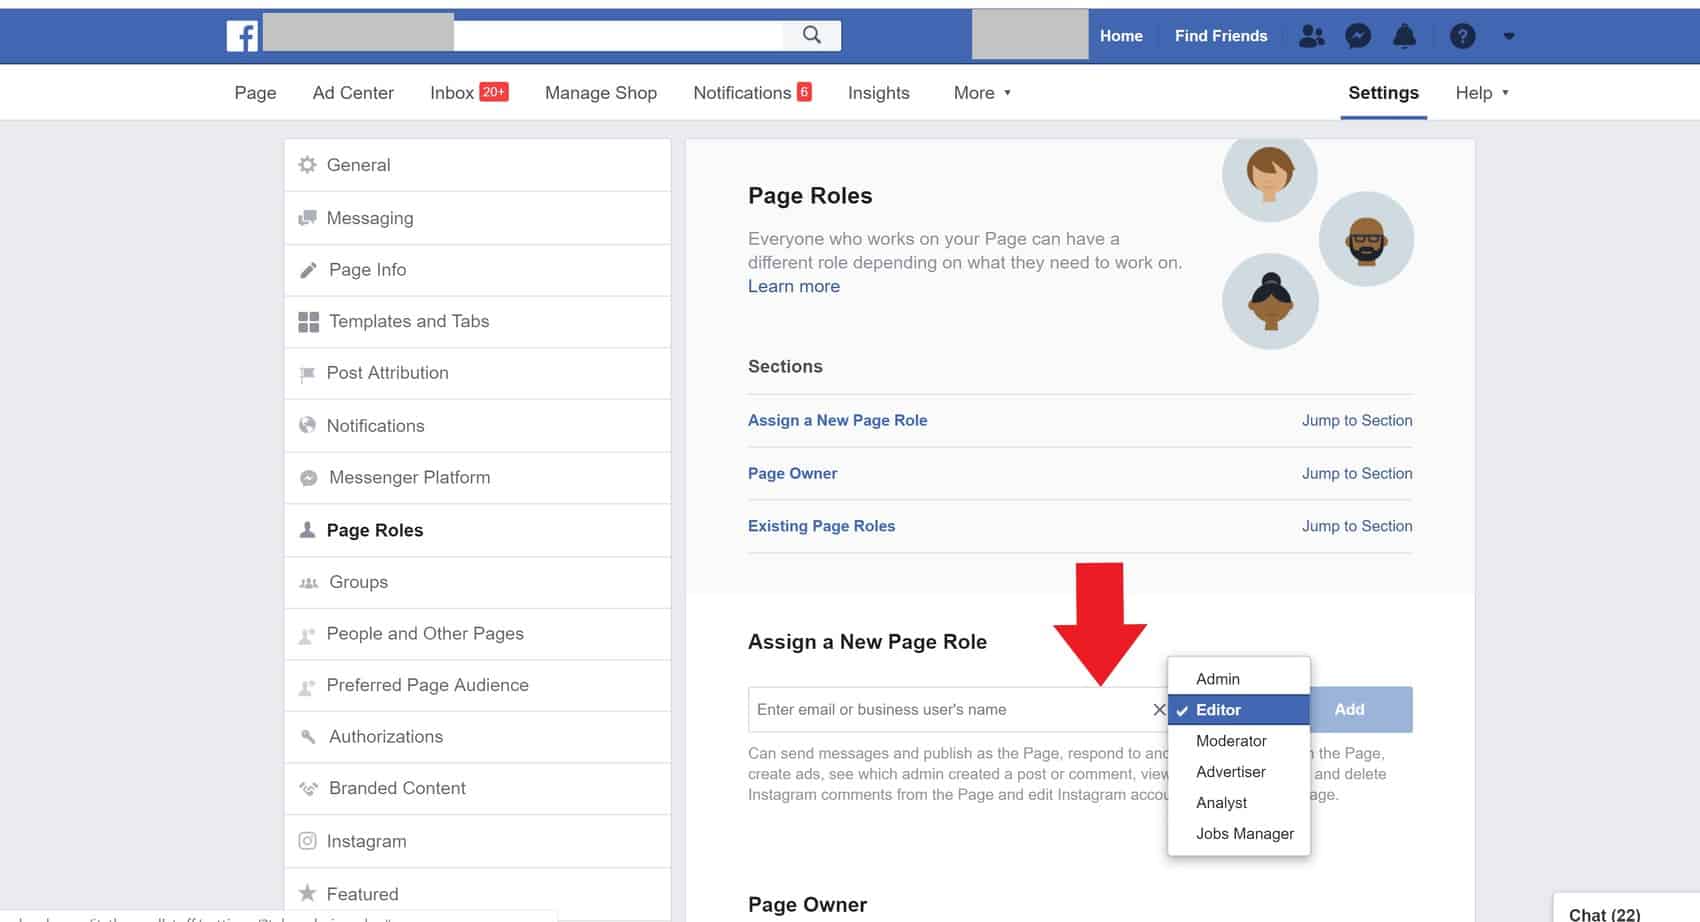
Now go to the left side of the page and find Page Roles. Click it, and you’ll be brought to a new screen where you can add people to your page.
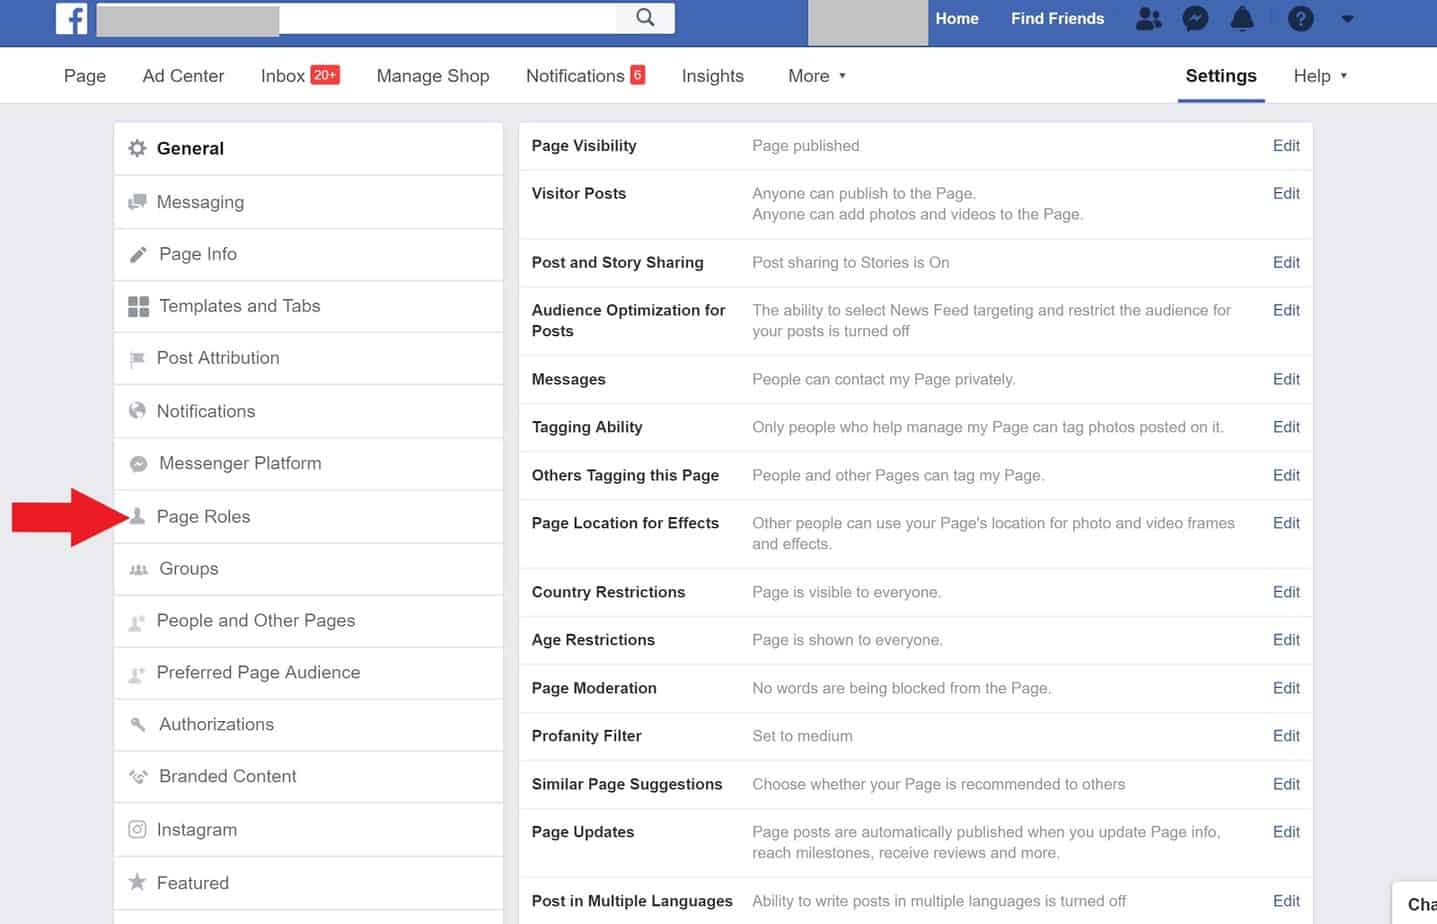
In the middle of the screen, you’ll find the Page Roles section. Be sure to provide the client with the email address you’d like added. The email needs to be typed into the Page Roles section and then they’ll have to select the person in the drop-down that appears. Click on the dropdown to the right of the box that says Editor, choose the most appropriate page role and click Add. At this point, the client will be asked to enter their password.
From here, you – the advertiser – will be sent an invite you will have to accept before you can access the page. If you’re unsure of the page role your client should assign to you, you can learn more about Facebook page roles in the help section.
Step 2 - Facebook Pixel Creation
Now that you have Facebook advertiser access, you’ll need to create the Pixel (if one doesn’t already exist). The Pixel will allow you to track a variety of actions on the client’s website including visits from users who click your links on Facebook, those who initiate checkout or complete a designated action.
Since you will be managing the client’s account, it’s best to create the Pixel through Business Manager. Remember, only account admins can create Facebook Pixels which makes completing Step 1 essential.
To create the Pixel, start by signing into Ads Manager. Next, click the gear on the top right side of the screen. This is the Business Settings.
On the left side of the screen are several bold menus with dropdowns. Click the dropdown arrow for Data Sources and select Pixels.
Click the blue +Add button next to Pixels.
A box will pop up and ask you for some information. Name your Pixel in the Pixel Name box. Then, enter the website URL in the box with the same name and click Create.
Installing the Pixel
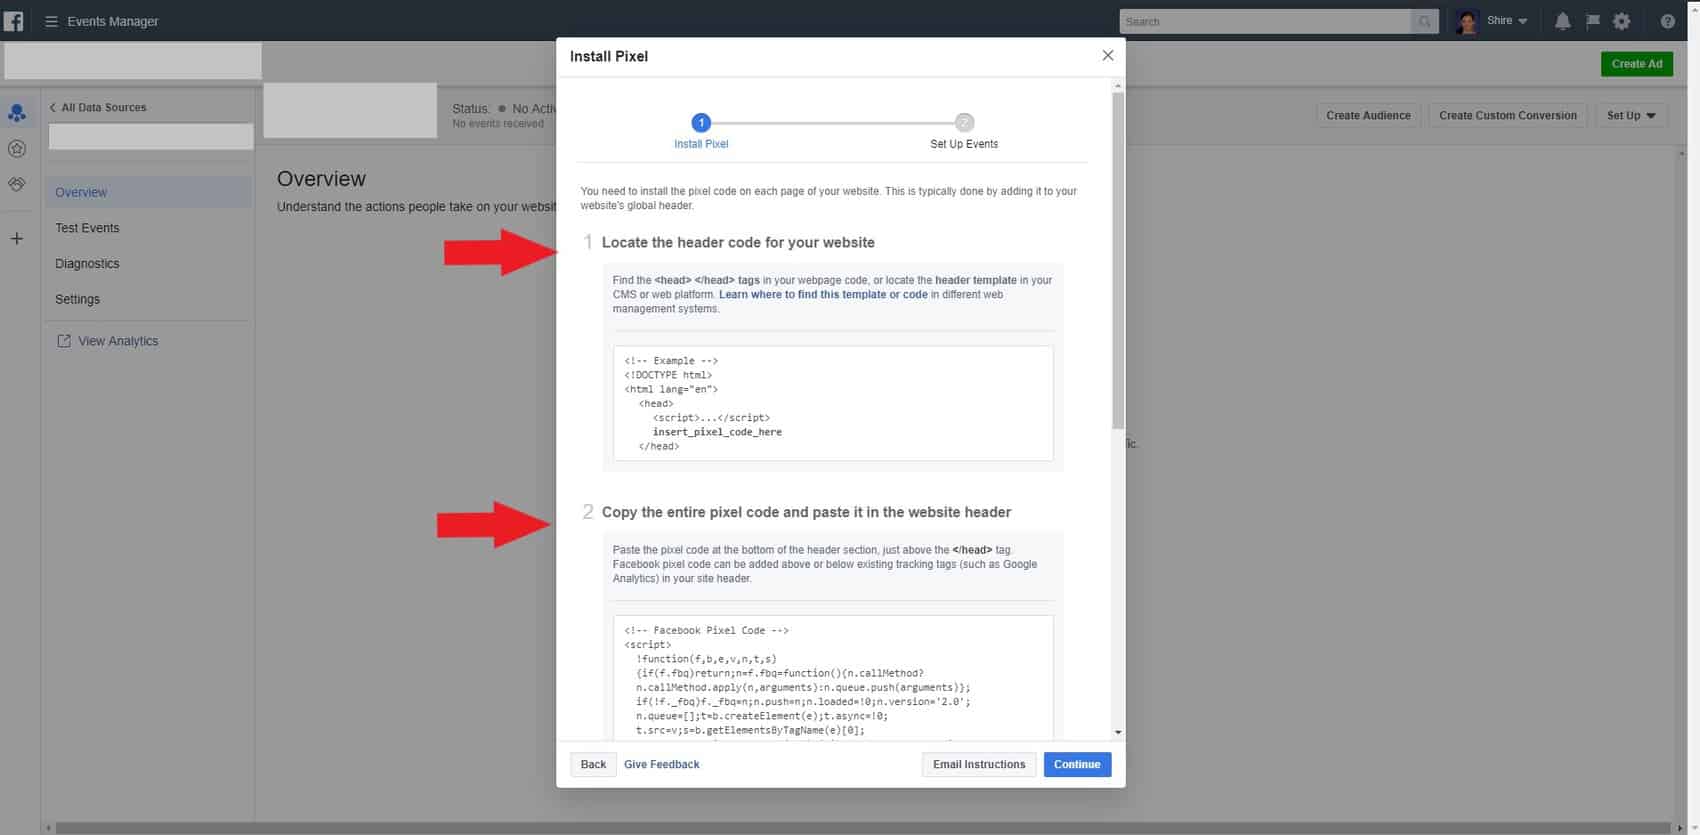
When you click Create, you’ll be brought to a new screen with instructions to install the Facebook Pixel. You can choose from several options, such as connecting a platform like Google Tag Manager, Shopify, Big Commerce, or Wix. In addition, you can also get the code to install manually or email the code to a developer so they can install it for you.
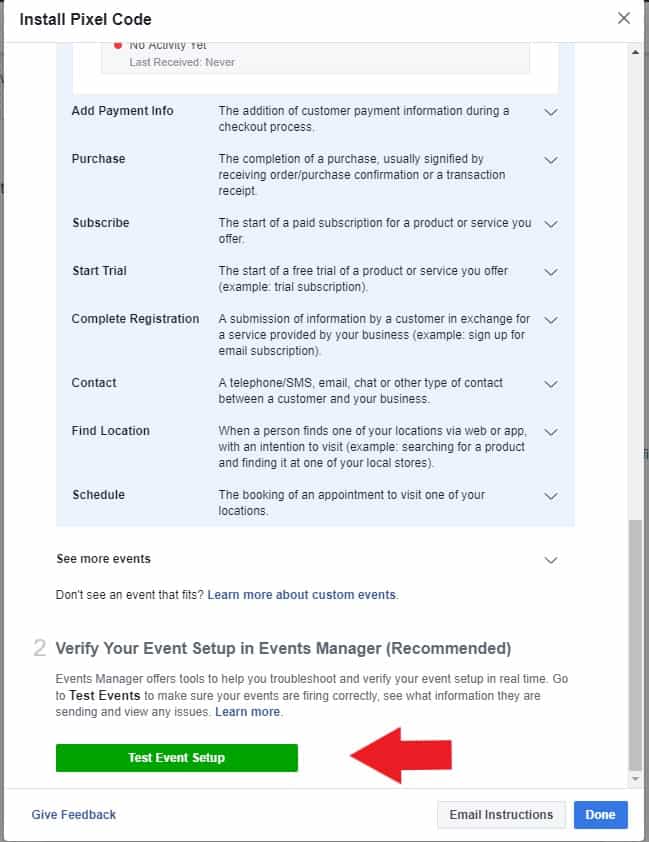
Once you’ve installed the code, you’ll need to set up the events. They work hand in hand like runners in a relay to measure your goals and conversions. Facebook will ask you to choose the industry that best fits what you do, so they can offer you the events that are best suited to your industry. Click the dropdown and set up the events you’d like to track.
Verify the event setup by scrolling down and clicking the green button labeled Test Event Setup. When you’ve verified that your events work properly, click Done.
Pixel access
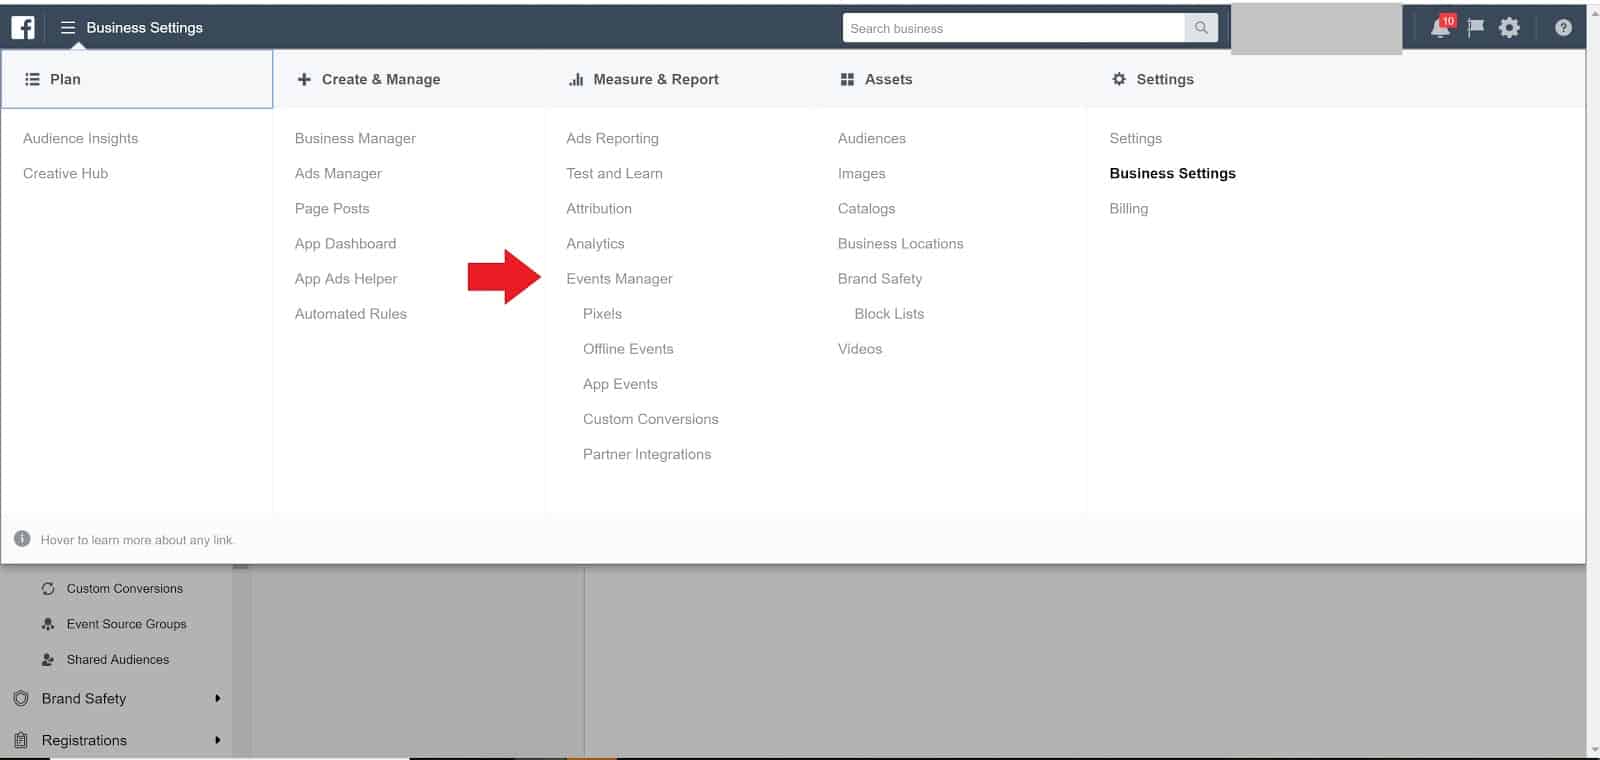
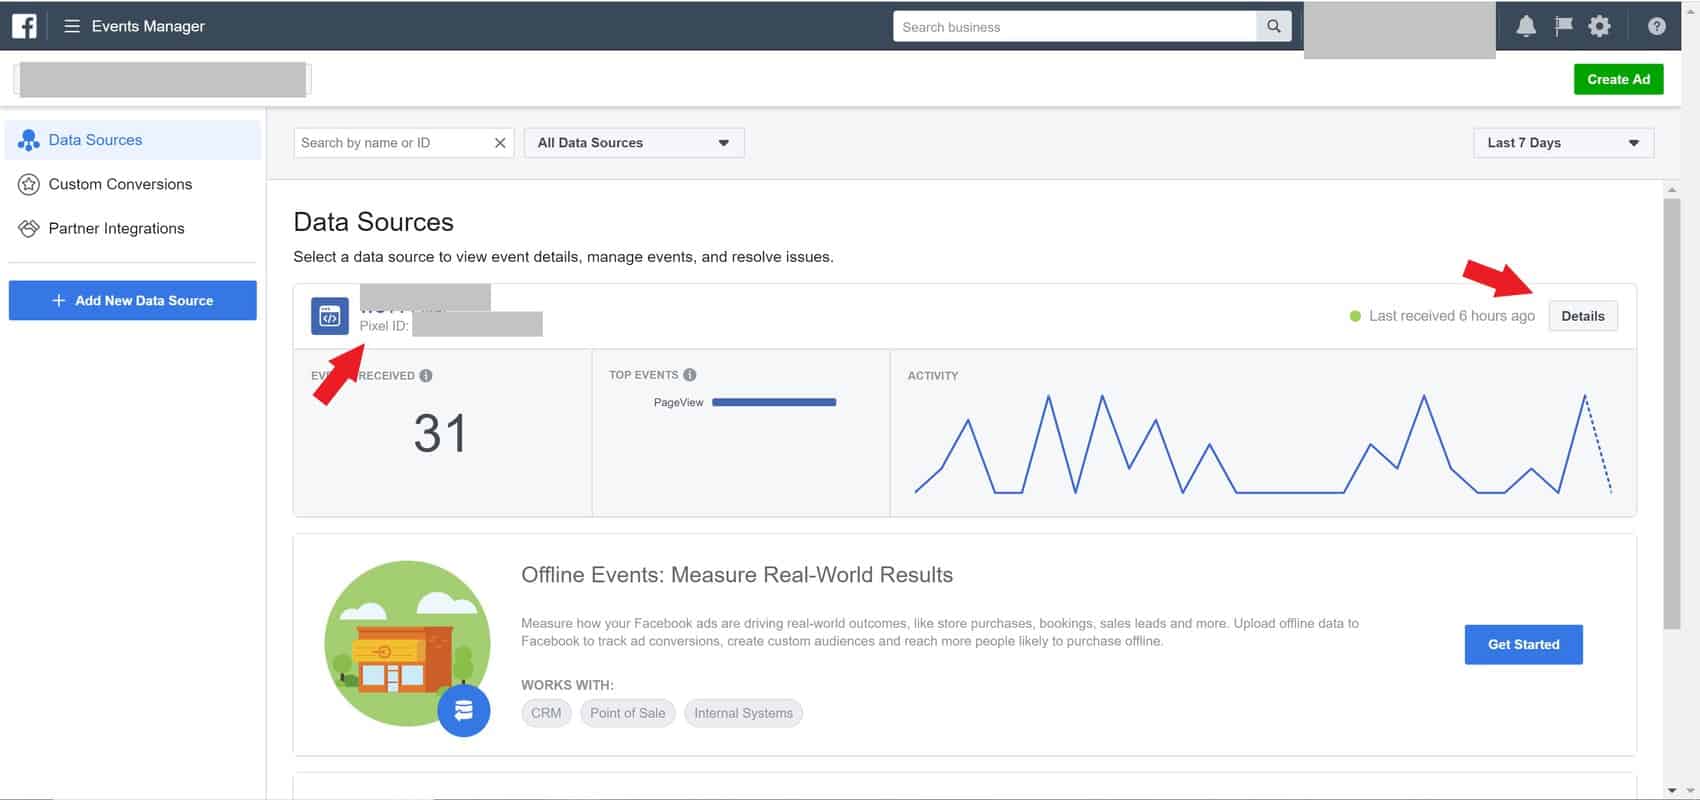
If you’ve created the Facebook Pixel yourself, then you already have access to it, and you’re covered. If someone else has created the Pixel, you’ll need to make sure you have access – if you’ve been properly added as an admin you will be able to navigate to the Pixel(s) from the Business Settings. You’ll find it under Events Manager. Here, you’ll see the Pixel and its activity.
You’ll also be able to find the Pixel ID. Make a note of the ID so that you can verify the correct Pixel is on your client’s website. Then, click Detail.
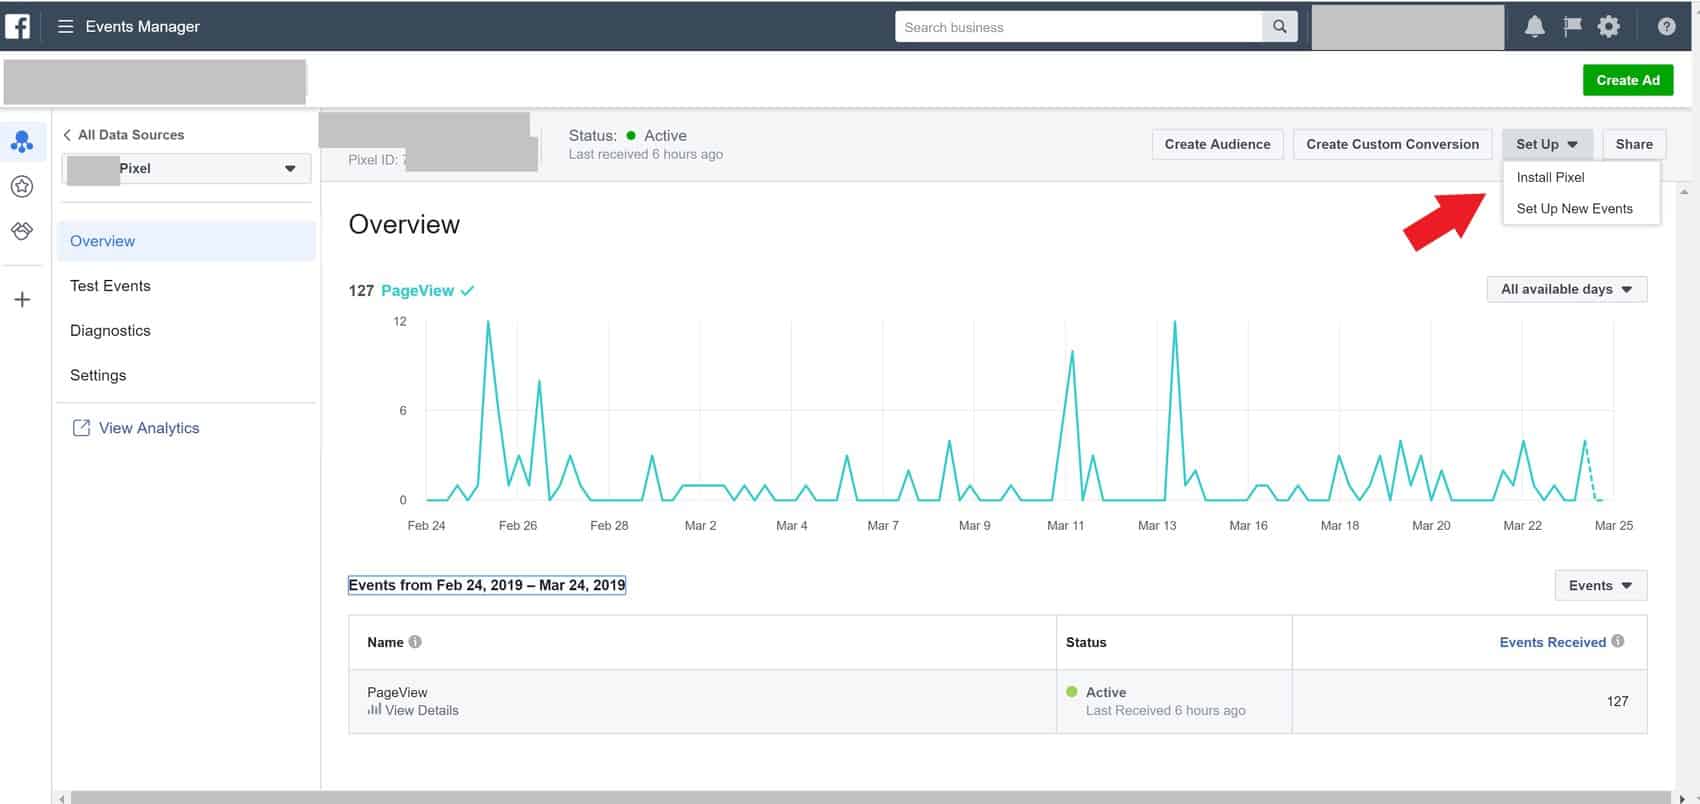
This will bring you to the Pixel and events setup where you can get the installation information for the Pixel or set up the events you’d like to track.
Facebook Pixel Helper
We suggest you get the Facebook Pixel Helper Chrome Extension. This handy little tool will assist you in confirming the Facebook Pixel is firing correctly. You can also check to see that your events are firing. You can review the custom parameters, load time, and more. It takes the guesswork out of Pixel verification.
Step 3 - Facebook Catalog Creation and Access
You’re in the home stretch now! You’ve requested and been granted Advertiser access, you’ve created a Pixel, and now you need to create the Product Catalog (if the client sells products). The first thing you should know is that the Facebook Pixel must be installed before the catalog can be set up.
You may or may not be familiar with what a product catalog is. A product catalog allows you to upload all of your products and information about them. Once you do this, you can use the product catalog to create dynamic ads, open a Facebook shop, tag products on Instagram, and generate regular Facebook ads and posts.
Product Catalog Setup Via Plugin or Integration
There are two possible ways to upload your product catalog. The way you upload your catalog depends on the platform you use for your website. If you’re using Shopify, Magento, WordPress, or another content management system, you should check to see if there is an integration that will upload your catalog for you.
Manual Facebook Catalog Setup Guide:
If a plugin or integration isn’t available for your website setup, then you’ll have to manually set up your Facebook Product Catalog. This can be done by going to the Business Settings in Ads Manager. From the dropdown menu, select Catalogs from under the Assets column.

Once you’re in the Catalog Manager, click the blue Create Catalog button.

Review the steps for creating a catalog by following the prompts. First, you’ll choose your industry – E-commerce, Travel, Real Estate, or Auto. At this point, the directions will vary slightly based upon your industry, but you’ll want to choose a manual upload since you don’t have an integration to use. When you do this, you’ll either upload individual products one at a time or add products in bulk.
When you’ve finished, click Create Catalog. Now you’re all set!
Troubleshooting Advertiser Access and Pixel Creation
From time to time, you may run into trouble. When things don’t go as planned, the best place to start is the Facebook Business Ads Help Center. If you still can’t find an answer, or all efforts have failed, try contacting support. While things generally go smoothly, you never know what may come up.
With everything created and access granted, you’re ready to create your first ad set. Now that you have access to your client’s Facebook Ads account, you can go on and learn strategies to make your ads successful!